Showing posts with label Giant Defy 4. Show all posts

Saturday, 5 December 2015

Building Yet Another Bike

(Updated 22 Dec 2015)

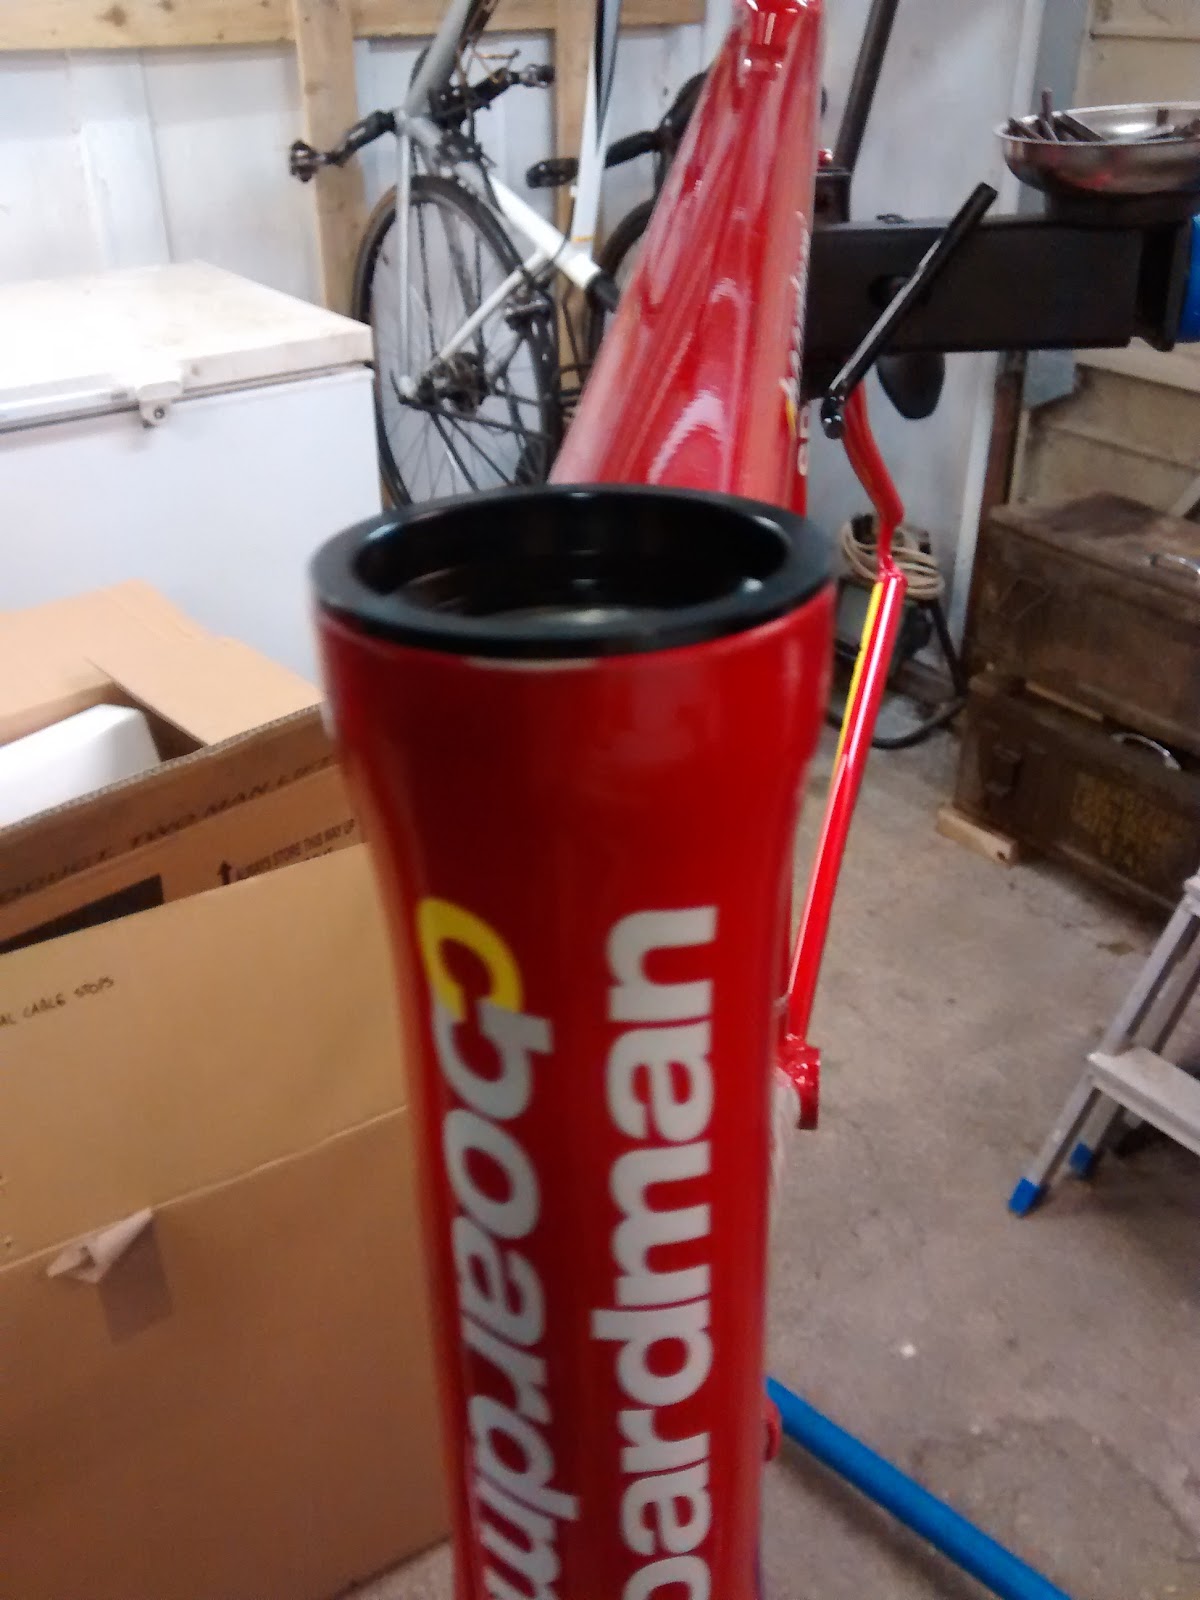
At the start of November 2015 I was knocked off my bike. As a result my Giant Defy was written off. Coincidentally I had been half looking for a cheap frame and fork to buy to put all my spare components onto and build a 3rd bike. I had been looking on and off for several months but by luck saw a brand new Boardman Road Sport Frame & Forks (55cm) on Ebay at an acceptable price:


I put a bid on and didn't expect to win but to my surprise I was the only bidder and won. Not only that, having paid, I found out that the seller worked a couple of miles from my house so although I waited a few days longer got it delivered for free.

The next step was to get hold of the bits that I did not have. This was: headset, dérailleur cable guide under the bottom bracket, band on front dérailleur adaptor and brake cable end stops for the internal rear brake cable. I had a complete 105 5700 Group set, handle bars, stem, saddle, pedals, wheels and nearly everything else from a number of previous upgrade projects, so hoped that the whole build would come in at around £100.

It took some careful measuring and research but I was able to source all the parts, either from Wiggle, Evans Cycles or Ebay. The biggest consideration was whether or not to have the headset fitted or to do it myself. I have had it done before for several reasons - 1 - you need some special tools that I am unlikely to use that often and 2 - getting the right headset can be difficult. 

However I decided that I'd do it myself and either buy or make the tools, not least because seller thoughtfully provided the specific details needed for the headset - that is as per the
SHIS number (Cane Creek - Standardised Headset Identification System) it was:
 

ZS 44 / 28.6 | ZS 44 / 30

To understand the SHIS numbers it is as follows: red text = headtube sizes Top | Bottom and text in green = fork steerer tube diameters Top | Bottom


Even with this information (and measuring the frame and forks with a digital vernier gauge) it was still quite hard to source and head set to this size at a reasonable price. In the end I found one on EBay, it was an "Oxford Components" brand.

The bearings themselves were (semi) sealed units and were ID = 30.2mm, OD = 41mm, Height =7.4mm, contact angle 45Deg. The bearings were marked as "CBB41 4D16":


Its just about possible to see on this photo

The tools needed were a headset press, crown race press and steerer cutter. An internet search shows that a headset press and a crown race seating tool can be home made. Cutting the steerer tube is tricky and I decided to buy a saw guide - I got the Topeak Threadless Saw Guide Tool from Evans Cycles at just under £20.

The Headset press I made with some 10mm studded rod and some aluminium plate that I had from a previous project. I cut 2 pieces of the plate into a square bigger than the 44mm diameter of the bearings and drilled a hole through the centre. Here it is before I pressed the bearing races in:


Lower race before being fitted


It worked quite well but the plate tended to slip to one side a little so it was necessary to tighten a little at a time and ensure that the bearings were being pulled in square and then loosening and re-aligning slightly to pull down another little turn. Despite this the bearings were inserted square within less than 10 minutes. It would obviously have been quicker with a proper tool but this one cost me nothing.

Here are the races seated:


For the crown race seating tool a different approach was needed. Again an Internet search says to knock it down with a piece of plastic plumbing pipe. Luckily I had a piece of this as well:


I had a little more trouble here - I could only drive it on a little way and then at an angle. I measured again and the vernier suggested just a few 100ths of a mm difference in the inner diameter of the race and outer diameter of the fork as you'd expect but it just would not go on. Therefore I very carefully used a fine file and dressed the fork surface a little. After this the crown race could be driven on flush to the top of the fork crown.


I could then loosely assemble the fork and stem to mark up the steerer for cutting. I was fitting 25mm of spacers so I had a little scope for 1 mistake:


Having marked up I mounted the fork in the vice and fixed the tool onto the steerer and made the cut:


It was very easy and made a very straight cut:


The Steerer Tube Offcut
I could then fit the star spangled nut.


There's probably a tool for this as well but I carefully put the bolt in the thread and pushed/tapped it in with a plastic mallet. Although it does need to be tight its only there for the  pre-load setting so does not need to be a massive job. I was able to align it pretty well with some gentle tapping with a plastic mallet

With all these task complete I could then assemble the fork and headset properly and move on to the more routine tasks.

There were a couple of issues on the way. Both were related to the brakes. 

The first was that the rear brake has an internal cable in the top tube. I had sourced these parts for the termination of the cable outers in to the frame from EBay:


Again some careful measuring of the frame and reference to the specification suggested that they should just drop in - they did not of course, but I was able to carefully open up the frame a little (it was probably a bit of paint and manufacturing tolerance) using the hand tool shown:


The hand tool used to open the holes
They fitted perfectly after this. I need to grease slightly this area to prevent the bare aluminium oxidising to quickly (which has happened to my son's bike).

The second problem was with both brakes. The Boardman frame needs longer drop brakes (57mm I believe) - the Shimano 5700 105 brakes I had were too short even with the pads at the lowest possible position. This was a bit of a blow but I had a spare set of Tektro brakes that had been fitted to my son's Boardman and these fitted. In addition, not just a longer reach is needed but also for the front brake I needed to pack out the brake from the fork using some on the ridged aluminium washers to stop the pads hitting the frame:


Thanks to Red Kite Cycles in Shirley for these in return for a biscuit fund donation.

Apart from this the build was reasonably straight forward.

I needed some threaded barrel adjusters for the front and rear dérailleur cables to join the down tube:


And then ended up with a completed bike:


I took a few weights:

Frame: 1.91 kg     Fork: 0.91 kg

Final bike weight: 9.3kg which I thought was not too bad

The final specification is :

Frame: Aluminium 55cm "Boardman Road Race"
Fork: Aluminium Boardman
Wheels: Shimano RS80
Tyres: Continental GP4000S
Gears: Shimano 5700 105 10Speed
Chainset: Shimano 105 50/34 172.5mm
Rear Dérailleur: Shimano 5700 medium cage
Front Dérailleur: Shimano 5700
Cassette: Shimano 105 11-28
Chain: KMC 10speed with missing link
Pedals: Shimano R540
Brakes: Tektro
Stem: Deda
Handlebars: FSA Aluminium
Saddle: Selle Royale


Cost (excluding tools):
Frame: £75.55
Barrel Adjusters: £4.99
Cable Ends: £2.55
Headset: £21.99
Bar Tape: 12.99

Total: £118.07

Not bad for a reasonable specification bike

(Updated 22 Dec 2015)

The first ride was OK. I needed to drop the saddle ~5mm which I did mid-ride. The rear brake was also pretty poor. I made 2 modifications - firstly to shorten the outer cable where it entered the top tube and secondly to pack the pads from the arms. 

Before

After
The difference in the before-after states was only 5cm or so at most but has made a marked difference in feel and performance. I have looked at my son's Boardman (same frame) and in fact the cable is shorter still so there's possibly some room for further improvement. 

The reason I packed the brake pads out (no photo available) is because the RS80 wheels fitted are quite narrow and this meant for the Tektro brakes they needed to be quite closed even in the normal position. This combined with the pads that are quite worn meant that I think quite a lot of the leverage is lost already even before the lever is pulled. There's probably only a few winter months left in the pads so I'll replace them and review the brakes then. If they are no better I'll probably get some of the long drop Shimano 57mm versions such as these:

 
Shimano BR-R451 Dual Pivot 57mm Drop Brake Caliper


Shimano R650 Dual Pivot 57mm Drop Brake Caliper


Sunday, 11 October 2015

Cole Rollen Wheel Failure - Update 4 November

I was riding home from work mid September on my Giant in and the rear wheel was rubbing. A quick glance when I got home suggested that it needed a little truing so I swapped back the original heavy duty Giant wheels and thought nothing more of it. This weekend I thought I'd spend a little while trying to pull it back to true and spotted this:


This is a pretty catastrophic failure  - I was lucky I swapped the wheels when I did as this would have been a ride stopping failure!

I have started to strip the wheel down (to keep the hub for general bike maintenance purposes) and have seen another crack in the rim. The front looks OK but I'll double check now.

The wheels have done about 12500 miles - mainly in the Spring to Autumn months. I don't think that's particularly impressive, given that I am also quite light.

Update 4 November: I have scrapped the rims. I cut them up and here is a couple of shots of the cross section:


Sunday, 29 March 2015

New Garmin Speed & Cadence Sensors

Updated 12 April 2015

I thought I'd treat myself and have a small (but relatively expensive upgrade). As a plug I ordered from Wiggle (with some other items) with free delivery and received within 2 days so excellent service as normal from Wiggle. But no Haribo this time.

I have bought the new Garmin accelerometer based speed and cadence sensors. This came in what seems to be the standard Garmin box:


Here's the official "sales photograph of the 2 sensors:


Garmin Speed and Cadence Sensor
The proper part number is: 010-12104-00 (Link)

This purchase was partially to replace the GSC10 on my Scott but also because the GSC10 on my Giant appears to have failed. Therefore I would fit the new parts to the Scott and move the GSC10 from the Scott to the Giant.

Here's a GSC10:

Garmin GSC10 speed and cadence sensor standard
Here's a GSC10 with the wheel magnet
I initially paired the units off the bike. I had read some articles on "that there internet" saying that people had had trouble pairing the new units and could only get one or the other. The issues seems to relate to the GSC10 being described as "Spd/Cad" sensor and the new unit being described as "Speed and Cadence" sensor:

Speed and Cadence Sensor Screen on Garmin 800

(yes I know that the 800 can take a screen shot but it was quicker to just use my phone). I started by disabling the GSC10 sensor from the bike profile. I then tried to re-pair which failed (normal behaviour I believe). I could then try again and then select "Sensor Type", and here I was able to select "Speed and Cadence".

It beeped at me a few times suggesting that it had found the 2 sensors. I then shook them about to simulate rotation and was able to get a reading of both speed and cadence. I noticed that whilst the speed sensor seemed to repsond quite quickly (what might be equivalent to a few wheel rpm) the cadence sensor seemed to take a lot longer to start to display a value - long enough that I thought that it had not paired and I repeated the process several times

It would appear that others have had this behaviour as well - and when I fitted it to the bike I got the same delayed start of monitoring.

Having established connectivity I fitted the sensors to the bike (phone photos so not great quality):


Wheel Speed Sensor


Wheel Speed Sensor
Cadence Sensor


Cadence Sensor
It is certainly easier to fit these sensors compared to a GSC10 where you need to try and fix it to different shape chainstays, then fit the magnets to a spoke and the crank arm and then try to jiggle the position that's optimal for both magnets without hitting any of the rotating parts.

Visually I think the cadence sensor is better, and whilst the chain stay is now clean, the wheel speed sensor does look quite bulky

Trying them both with the Garmin on the bike repeated the detection of the units - speed sensor quite quickly responds whilst cadence needs a number of turns. Whether in the latter case this is related to the unit going to sleep to conserve the battery and hence needing a wake process I don't know.

I've not ridden on the road yet so time will tell how they perform.

Updated 12 April 2015.
Firstly I had a very difficult time getting the new sensors to stay connected if I had powered the Garmin off or the sensors themselves had powered down. Lots of pairing and re-pairing followed and in the end I had to resort to looking on the internet. The solution appeared to be to remove the batteries, wait and then re-insert them. This apparently takes them out of "shipping mode" - whatever that is. After having done this I don't seem to have had any further issues with the sensors waking and pairing correctly. The wheel speed sensor is ready before I set off as it has already woken as the bike is moved, and the cadence sensor seems to wake after about 4-5 pedal strokes - generally once I am actually riding. I am glad I have resolved this as I was about 5 minutes from sending them back! Quite why Garmin could not have documented this in the instructions I am not clear and it would have saved a lot of aggravation and customer dis-satisfaction.

Major Service and Winter Recovery Actions

I normally "deep clean" my bikes once a year around Easter time (i.e. some time between mid-March to the end of April). This is a proper clean rather than a superficial clean as per here - components removed, cleaned and stripped (if required) and replacing the chain and occasionally the cassette depending on condition and mileage. On the Giant I also put back on the Cole Rollen wheels replacing the heavy but strong original Giant branded wheels the bike came with.

The timing for this is that in theory by this time of year we should be in the better weather, the salt is gone from the road and it should be a bit drier. However this year my Giant was in a quite dreadful state and I had been deferring the clean for a number of weeks and finally I could put it off no longer. There were a number of jobs that were making the bike quite borderline. Firstly the brake pads (both front and rear) were very worn, both brake calipers were stiff and would not spring back properly (I had had to strip the front one several weeks earlier to free it off), the chain was way over 1% worn and recently I had discovered that the rear dérailleur was very stiff as the upper pivot, whilst not seized, was stiff enough that when in the small chain ring could not rotate enough to take the tension up. This the list of jobs was quite extensive. Alongside all of these jobs I would also fully clean the bike with some T-Cut and polish.

Firstly the brakes - here's a couple of pictures showing the wear to the rear pads - there was some life left in them but not a lot:


Rear Pads


Another view of rear pads but also the level of road muck on the calipers

I stripped both calipers back down again and carefully lubricated the main areas. However I think now that these calipers might be starting to decline - there is clear sign of aluminium corrosion after 5 years of all year round use and this means that they are never going to be trouble free any more and need a lot of regular maintenance through the years- this compares to having been on the bike and doing nothing to them for the first 4 years or so.

I fitted replacement brake pads - not new but not that worn - so some bedding in of the pads will be needed over the coming miles.

The most difficult job I could see was the service of the rear dérailleur - I have cleaned the jockey wheels but not done any other jobs. Fortunately Google is our friend and on the Park Tools web site was an excellently detailed article on how to do the job: http://www.parktool.com/blog/repair-help/rear-derailleur-overhaul

The first problem was getting the dérailleur off the hanger - the age old problem of steel/aluminium corroding together - after over a year of it being fitted it was extremely tight to remove - it was not possible to undo it using just a simple Allen key. I used as much releasing agent as I could but still could not shift it. In the end I needed a bit and socket wrench to get the leverage up. Even then it was tight and I was concerned that I might fail the hanger itself. In the end it did come off but was tight.

Following the instructions from the Park Tools site I decided to mount an Allen key in my vice to hold the dérailleur


Mounting the dérailleur

Disassembly was exactly as per the Park Tools site. I expected the B Plate to be under more spring pressure when I removed the C Clip but there was very little in the event. (It was also easy to rebuild the unit because of this as well).


The Upper Pivot Dis-assembled and laid out
The problem was that there was a light film of rust and dry lubricant between the body and the pivot pin. After cleaning the inner diameter and the bush and applying some grease all was well again. Re-assembly was the reverse of dis-assembly although it took me 3 attempts the get the B-screw plate aligned correctly despite having sketched the component layout as I took it apart. Fortunately I had a 2nd identical (but long cage) unit to compare against.

After this the rest of the jobs were pretty straightforward - I was going change the rear dérailleur cable any way but as I was removing it found fraying inside the shifter and part way down the length - normally I moved the rear cable and fit to the front dérailleur but just binned it this time. So I ended up fitting new cables to both front and rear. 

I also fitted a new chain as planned - another KMC X10 with split link. I normally keep the old split link and put it with the puncture kit on the bike as an emergency spare, but this was was absolutely spent - as was the chain.

It took a bit longer to do than previous years as I had to service the brake calipers and dérailleur as well compared to previous years, but the bike looks clean and shiny again

I expect the bike to stay fairly clean now with only light cleans until around September when the autumn weather begins. From that point the dirt will build up and the wear rates will start to accelerate again.

What I have found is that chain wear is minimal from March to October as the chain stays dry and clean, but then as the weather turns wet and the roads muddy the grit and muck gets in the chain and all the wear occurs over the winter months.

This is supported by comparing the wear rates of the Giant (year round use all weather) and the Scott (mostly spring-autumn use in drier weather). Both use the same chains but the Giant's chain is total scrap at over 1% use after normally 2500 miles compared to 0.5-0.75% wear on the Scott for similar mileage.

I have just got to do the same job to the Scott but this won't take as long - not least as the brakes and dérailleur are all OK.