Sunday 29 March 2015

K-Edge Out Front Garmin Mount

Since I got my Garmin I have fitted it to the stem using the standard plastic Garmin mount. Recently I bought a K-Edge Out Front Garmin Mount. There was no real need for it but I thought I could convince myself that it would move the Garmin further forward and make it slightly easier to read. That's a somewhat subjective reason of course.

I have to say that the quality of the manufacture is excellent, and once fitted its clear its not going to move. I have actually tilted it up slightly to put it at a slight angle and hopefully slightly reduce glare.

The quality of the Garmin mount is excellent- a firm and definite click .

Note that the mount must be fitted to the right of the stem as the shape is designed to align the Garmin on the centre line of the stem, Its actually a very close fit as the Garmin rotates into position - a very slight rub as it is aligned. I don't see this as a problem.

Here are some photos:

Front View

Side on view showing the slight up tilt


View from the saddle

New Garmin Speed & Cadence Sensors

Updated 12 April 2015

I thought I'd treat myself and have a small (but relatively expensive upgrade). As a plug I ordered from Wiggle (with some other items) with free delivery and received within 2 days so excellent service as normal from Wiggle. But no Haribo this time.

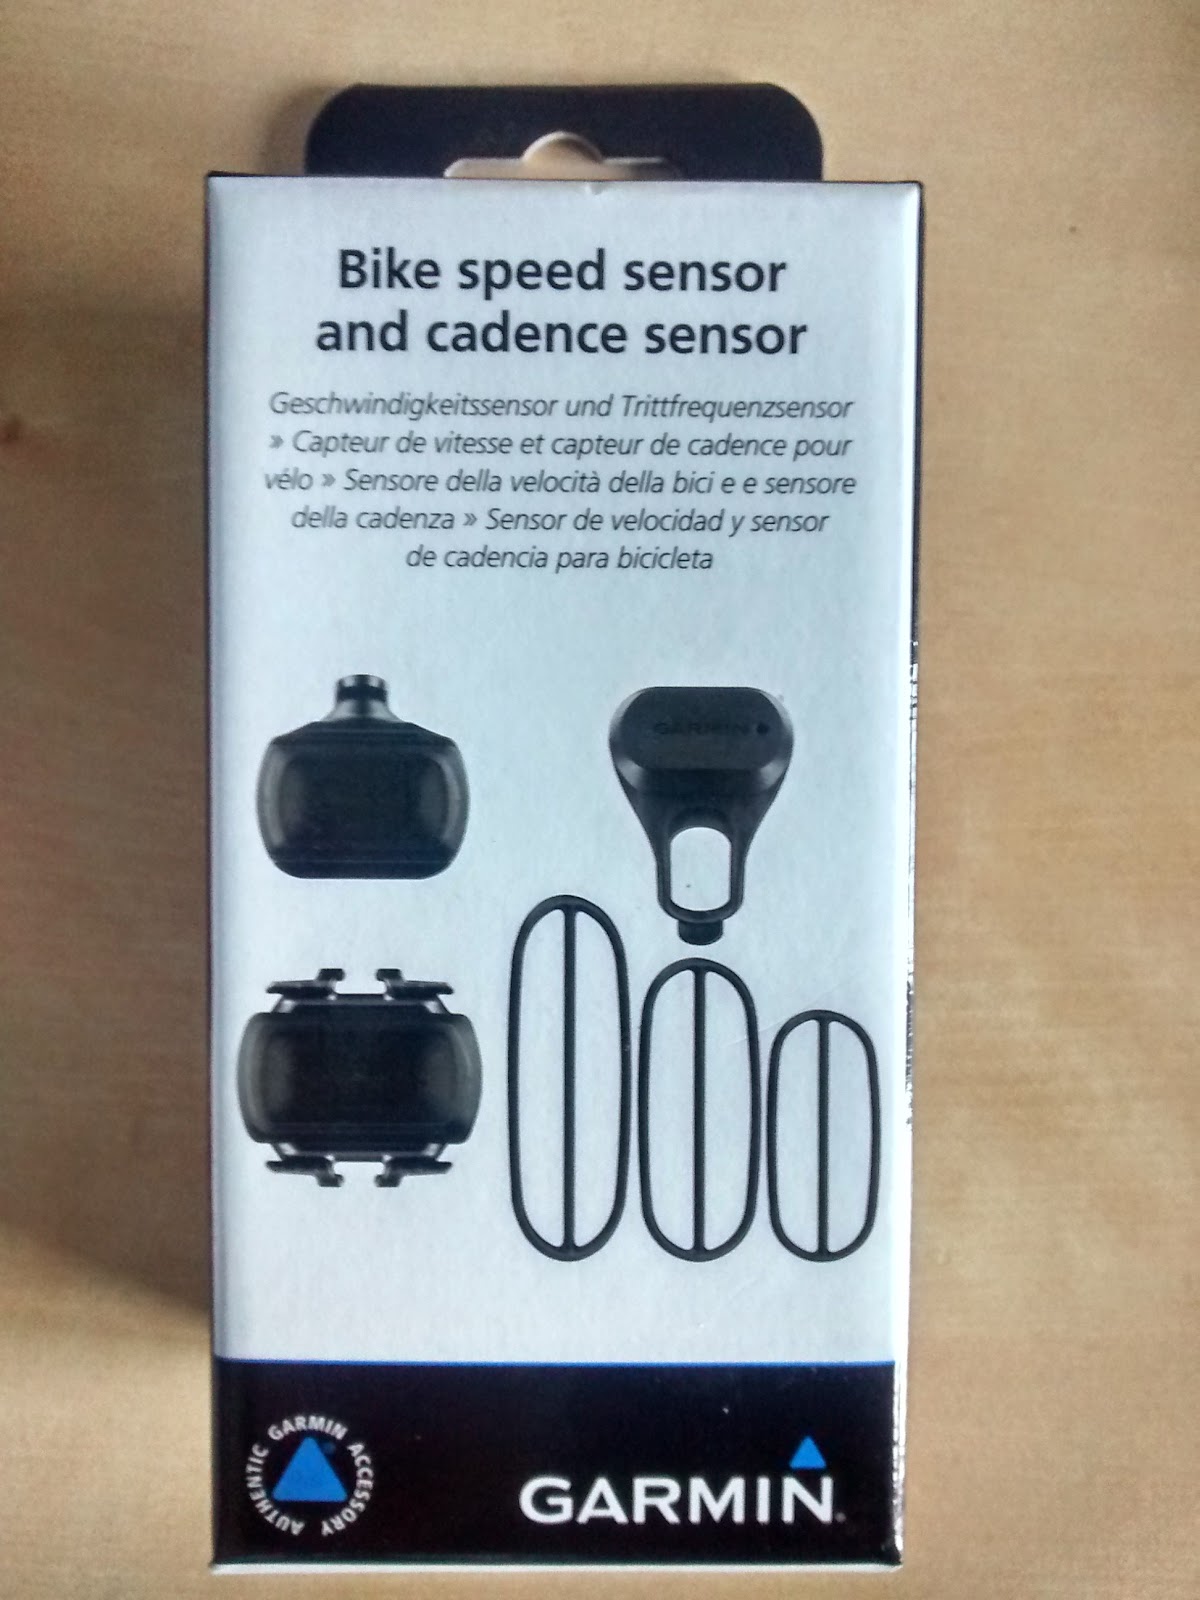
I have bought the new Garmin accelerometer based speed and cadence sensors. This came in what seems to be the standard Garmin box:


Here's the official "sales photograph of the 2 sensors:


Garmin Speed and Cadence Sensor
The proper part number is: 010-12104-00 (Link)

This purchase was partially to replace the GSC10 on my Scott but also because the GSC10 on my Giant appears to have failed. Therefore I would fit the new parts to the Scott and move the GSC10 from the Scott to the Giant.

Here's a GSC10:

Garmin GSC10 speed and cadence sensor standard
Here's a GSC10 with the wheel magnet
I initially paired the units off the bike. I had read some articles on "that there internet" saying that people had had trouble pairing the new units and could only get one or the other. The issues seems to relate to the GSC10 being described as "Spd/Cad" sensor and the new unit being described as "Speed and Cadence" sensor:

Speed and Cadence Sensor Screen on Garmin 800

(yes I know that the 800 can take a screen shot but it was quicker to just use my phone). I started by disabling the GSC10 sensor from the bike profile. I then tried to re-pair which failed (normal behaviour I believe). I could then try again and then select "Sensor Type", and here I was able to select "Speed and Cadence".

It beeped at me a few times suggesting that it had found the 2 sensors. I then shook them about to simulate rotation and was able to get a reading of both speed and cadence. I noticed that whilst the speed sensor seemed to repsond quite quickly (what might be equivalent to a few wheel rpm) the cadence sensor seemed to take a lot longer to start to display a value - long enough that I thought that it had not paired and I repeated the process several times

It would appear that others have had this behaviour as well - and when I fitted it to the bike I got the same delayed start of monitoring.

Having established connectivity I fitted the sensors to the bike (phone photos so not great quality):


Wheel Speed Sensor


Wheel Speed Sensor
Cadence Sensor


Cadence Sensor
It is certainly easier to fit these sensors compared to a GSC10 where you need to try and fix it to different shape chainstays, then fit the magnets to a spoke and the crank arm and then try to jiggle the position that's optimal for both magnets without hitting any of the rotating parts.

Visually I think the cadence sensor is better, and whilst the chain stay is now clean, the wheel speed sensor does look quite bulky

Trying them both with the Garmin on the bike repeated the detection of the units - speed sensor quite quickly responds whilst cadence needs a number of turns. Whether in the latter case this is related to the unit going to sleep to conserve the battery and hence needing a wake process I don't know.

I've not ridden on the road yet so time will tell how they perform.

Updated 12 April 2015.
Firstly I had a very difficult time getting the new sensors to stay connected if I had powered the Garmin off or the sensors themselves had powered down. Lots of pairing and re-pairing followed and in the end I had to resort to looking on the internet. The solution appeared to be to remove the batteries, wait and then re-insert them. This apparently takes them out of "shipping mode" - whatever that is. After having done this I don't seem to have had any further issues with the sensors waking and pairing correctly. The wheel speed sensor is ready before I set off as it has already woken as the bike is moved, and the cadence sensor seems to wake after about 4-5 pedal strokes - generally once I am actually riding. I am glad I have resolved this as I was about 5 minutes from sending them back! Quite why Garmin could not have documented this in the instructions I am not clear and it would have saved a lot of aggravation and customer dis-satisfaction.

Major Service and Winter Recovery Actions

I normally "deep clean" my bikes once a year around Easter time (i.e. some time between mid-March to the end of April). This is a proper clean rather than a superficial clean as per here - components removed, cleaned and stripped (if required) and replacing the chain and occasionally the cassette depending on condition and mileage. On the Giant I also put back on the Cole Rollen wheels replacing the heavy but strong original Giant branded wheels the bike came with.

The timing for this is that in theory by this time of year we should be in the better weather, the salt is gone from the road and it should be a bit drier. However this year my Giant was in a quite dreadful state and I had been deferring the clean for a number of weeks and finally I could put it off no longer. There were a number of jobs that were making the bike quite borderline. Firstly the brake pads (both front and rear) were very worn, both brake calipers were stiff and would not spring back properly (I had had to strip the front one several weeks earlier to free it off), the chain was way over 1% worn and recently I had discovered that the rear dérailleur was very stiff as the upper pivot, whilst not seized, was stiff enough that when in the small chain ring could not rotate enough to take the tension up. This the list of jobs was quite extensive. Alongside all of these jobs I would also fully clean the bike with some T-Cut and polish.

Firstly the brakes - here's a couple of pictures showing the wear to the rear pads - there was some life left in them but not a lot:


Rear Pads


Another view of rear pads but also the level of road muck on the calipers

I stripped both calipers back down again and carefully lubricated the main areas. However I think now that these calipers might be starting to decline - there is clear sign of aluminium corrosion after 5 years of all year round use and this means that they are never going to be trouble free any more and need a lot of regular maintenance through the years- this compares to having been on the bike and doing nothing to them for the first 4 years or so.

I fitted replacement brake pads - not new but not that worn - so some bedding in of the pads will be needed over the coming miles.

The most difficult job I could see was the service of the rear dérailleur - I have cleaned the jockey wheels but not done any other jobs. Fortunately Google is our friend and on the Park Tools web site was an excellently detailed article on how to do the job: http://www.parktool.com/blog/repair-help/rear-derailleur-overhaul

The first problem was getting the dérailleur off the hanger - the age old problem of steel/aluminium corroding together - after over a year of it being fitted it was extremely tight to remove - it was not possible to undo it using just a simple Allen key. I used as much releasing agent as I could but still could not shift it. In the end I needed a bit and socket wrench to get the leverage up. Even then it was tight and I was concerned that I might fail the hanger itself. In the end it did come off but was tight.

Following the instructions from the Park Tools site I decided to mount an Allen key in my vice to hold the dérailleur


Mounting the dérailleur

Disassembly was exactly as per the Park Tools site. I expected the B Plate to be under more spring pressure when I removed the C Clip but there was very little in the event. (It was also easy to rebuild the unit because of this as well).


The Upper Pivot Dis-assembled and laid out
The problem was that there was a light film of rust and dry lubricant between the body and the pivot pin. After cleaning the inner diameter and the bush and applying some grease all was well again. Re-assembly was the reverse of dis-assembly although it took me 3 attempts the get the B-screw plate aligned correctly despite having sketched the component layout as I took it apart. Fortunately I had a 2nd identical (but long cage) unit to compare against.

After this the rest of the jobs were pretty straightforward - I was going change the rear dérailleur cable any way but as I was removing it found fraying inside the shifter and part way down the length - normally I moved the rear cable and fit to the front dérailleur but just binned it this time. So I ended up fitting new cables to both front and rear. 

I also fitted a new chain as planned - another KMC X10 with split link. I normally keep the old split link and put it with the puncture kit on the bike as an emergency spare, but this was was absolutely spent - as was the chain.

It took a bit longer to do than previous years as I had to service the brake calipers and dérailleur as well compared to previous years, but the bike looks clean and shiny again

I expect the bike to stay fairly clean now with only light cleans until around September when the autumn weather begins. From that point the dirt will build up and the wear rates will start to accelerate again.

What I have found is that chain wear is minimal from March to October as the chain stays dry and clean, but then as the weather turns wet and the roads muddy the grit and muck gets in the chain and all the wear occurs over the winter months.

This is supported by comparing the wear rates of the Giant (year round use all weather) and the Scott (mostly spring-autumn use in drier weather). Both use the same chains but the Giant's chain is total scrap at over 1% use after normally 2500 miles compared to 0.5-0.75% wear on the Scott for similar mileage.

I have just got to do the same job to the Scott but this won't take as long - not least as the brakes and dérailleur are all OK.

Wednesday 18 March 2015

Scott CR1 Pro Headset

(March 2019 - link to BBB bearing updated)

I bought my Scott CR1 Pro in the Summer of 2013 from Westbrook Cycles. It's a great frame but a poor element was the headset it was supplied with - although the cups were pressed into the frame it still used traditional caged open ball races. After the first winter (Feb 2014) I spotted the tell-tale traces of brown water from the headset bearings. I took the stem off to drop the forks and cleaned and re-greased the bearings. All was fine for the next 12 months but recently, after a period of no use, the steering was lightly seized - it was OK again after being exercised but it was clear the bearings were rusty again. This time I decided that it was not worth cleaning again as the design is prone to deterioration in wet weather and it would be better to replace it with a better design using sealed cartridge bearings - as with my Giant

I had looked before to try and find the appropriate headset from various on-line sources - but its very difficult to determine the exact part without measurements or some other knowledge. A couple of sites have an on-line selector but you need some detailed information such as bearing angles or inner diameters. Further you need some special tools to both remove the old head set races from the frame and the and crown race from the fork and to press back in the new races and these were tools I did not have nor would I justify buying for perhaps 1 or at most 2 uses.

I mentioned this here when I wrote about building my Scott.

The outcome was I decided to take it back to Cult Cycles. I took it here for 2 reasons -one - they'd fitted the original headset for me 18 months earlier and I was happy with the work and - two - one of my sons worked there over the summer of 2014 and I was happy with the work and prices that Cult Cycles charged for work on his bike and on other customers bikes. I took it over on the Saturday but they did not have the parts s I left it there until the following Wednesday when it was ready for collection.

The headset fitted was a BBB Semi-integrated headset BHP-51


  • Semi-integrated headset.
  • Headtube ID: 44 mm.
  • Bearing diameter: 1.1/8" - 41.0 mm.
  • 36ºx45º sealed CrMo bearings.
  • Aluminum 8 mm cone spacer.
  • Replacement bearings available (BHP-90 and BHP-92)
 Its all fitted nicely and the steering is back to being as it should be - with the added benefit that spare bearings should be a drop in replacement in a few years time when the bearings probably will fail again - based on the life of the sealed bearings on my Giant - documented here

Here the headset a few weeks later (in my garage):


100 Greatest Climbs #54 & #56 - White Horse Bank & Boltby Bank

Disappointed after the failure of Rosedale Chimney I had a couple of other possible climbs pencilled in over the weekend if weather and time permitted. These were White Horse Bank and Boltby Bank. Both were graded at 7/10 so I hoped that these would be possible successes. Whilst there was a definite plan to do Rosedale Chimney there was no plan for these - other than I had prepared a short route (~14 miles) which was a "there and back" route that did both of them starting in the village of Kilburn in Yorkshire

On the Sunday we sort of did all we wanted to do in the day and there was going to be just enough time to drive over and do the ride, so we did.

We parked in the car park opposite the village pub and I got changed as quickly as possible. The pub was about 1/2 mile from the foot of the White Horse Bank climb so I rode in the opposite direction for a mile or so before turning round - I needed to be at least a little prepared for the climb. Just outside the village you can see the White Horse:


I took this with my phone hence the grainy quality

Here's a Wikipedia article and picture:

It was about 1/2 mile from where I took this picture to the foot of the climb, and like Rosedale Chimney went straight up one it started:


This climb was quite different to Rosedale Chimney - it had several switchbacks to ease the gradient and this meant that the gradient flattened quite a bit in a few places. Here's the Strava segment in detail:


 The bigger bend about 1/2 way up was a car park for the hill and just before this I sailed past a mountain biker:


Like all mountain bikers his lowest gear made my 34-28 look like a pro on the flat. This was a 1x10 I think with what looked like a 26-34! We exchanged a cheery word and I left him spinning up, slightly jealous of the gearing but not of the weight and rolling resistance. The hill was hard - well deserving of the 7/10 but I felt confidant and strong as I got to the top.


The climb time was 9:45 (vs 9:00 from the book) and I was 371st of 1394. Given I had minimal warm up I was quite pleased with the time and position (~top 25%).


I made another video with my Garmin Virb:


And here's a link: http://youtu.be/WeIptGh2phM 

Flushed with confidence from White Horse Bank I pushed on the 5 miles or so to Boltby Bank on the other side of the A170. There was a strong headwind towards the hill that was wearing but almost before I knew it I was at the top of the climb and descending. The first thing was - wow it was steep and second - how bad the surface was. I had the back wheel locking and bouncing all over the place and got sore hands before the bottom trying to hold the brakes to get the speed down to a safe level before I got to the bottom. Once the gradient eased so road surface improved as well and I rode far enough along to make sure that I had a chance to warm up again before the climb really started

I turned round and started back up - and even at the bottom it was hard. I pushed on and there were a few areas where the gradient eased and I thought I'd be OK. Once past the last left turn (to a farm) the gradient started to bite and I realised that it was going to be tough. The gradient kicked up to around 20% and the road was dead straight. It was Rosedale Chimney all over again. I kept pushing and kept going slower and my heart rate kept getting higher and higher. I was determined not to fail again and kept pushing - but just like Rosedale Chimney I was absolutely in the red and I had to stop and walk again. I got up to the right hander near the top and got back on a carried on riding - but there was no way I could have ridden the whole climb on the day. Here's the segment:


I did in 8:34 (vs the book time of only 6:30) and placed 322nd of 875 so further down the list. It was a tough climb - harder than 7/10 in my opinion. I also made a video of yet another failure:


The strong headwind over to the climb was now my friend and I had a good pace back to the A170, so good that I picked up a 2015 KOM and a few 2015 top 2 places:


It was then a relatively uneventful ride back to the car. The descent of White Horse Bank was also interesting. Again, like Boltby, the surface was poor and the back wheel was locking and bouncing all over the place. The bends also needed a lot of care to slow properly and safely for them. Some deer ran across the road 100m or so in front of me in one place as well!. I left the video running once at the bottom for the run back to the village and my car.


I was disappointed with another failure -  I managed only 1 of the 3 attempted climbs over the weekend. That these 3 hills were beasts is no argument. I had planned to fit a 12-30 cassette for the weekend but thought that I was up for the task - only to have been bought back to earth with a bump. Was it worth doing them? Absolutely. Am I disappointed to have had to walk? Again - absolutely. But have I ticked a few more of the hills off - again absolutely .

Monday 16 March 2015

A Scarborough Fernicular Railway

When we went to Scarborough we rode the southern most Cliff Railway from the seafront to the Esplanade for the princely sum of 80p each.

Here's a view from the top looking down:


I couldn't see any emergency brakes or similar safety systems - best not too look to carefully sometimes!

Solihull to Malvern

A bit of an odd weekend on the - itching to get out but not really wanting to go!

I have been a bit put off by the seemingly long period of cold weather (although its been relatively mild to be honest this winter) and was not sure whether I wanted to face another few hours in the cold. Also part of it was being a little bored with the local (i.e. shorter) local rides. In the end I decided (with help and agreement from my wife) to ride to Malvern, and for her to pick me up there. I plotted a ~60 mile route on the bike but in the car its just over 45 miles and and hour or so.

Here's the actual route:

The route was generally slightly down hill all the way to Malvern with then a climb up and round the northern end of the Malvern Hills. It was a familiar route to just north of Evesham although I approached the town from a slightly different road. It was then pretty well due west through Pershore and Upton upon Severn to Malvern and this was all new.

It turned out to be a very pleasant route but a very strong headwind all the way. At the point I crossed the A38 it was very exposed and I had to drop onto the 34T chain ring for a short period.


Once in Malvern the climb (and all the climbing on this route was in Malvern) was relatively smooth and easy and a good leg stretcher.

I didn't set any Strava segments alight but this was not the purpose on this ride.

I got to Malvern a little earlier than predicted so I had a coffee in Costa (and brought my bike into the store) and then my wife picked me up in the Waitrose car park just around the corner, just as it started raining

The route came in just under 60 miles, so extending the route to ride home as well would be just over 100 miles - something for the Summer I think. It was worth going out in the end!

1974 Cycling Stuntman

I saw this courtesy of the https://bikevcar.wordpress.com/ blog:
 

 http://player.bfi.org.uk/film/watch-cycling-stunt-man-atv-today-1974-1974/


100 Greatest Climbs #55 - Rosedale Chimney

My wife and I had a holiday in Pickering and Yorkshire over the weekend of 13-16 March. It was actually for my birthday and I chose the location as we'd not been in this area of the country before. We stayed in the Pickering Best Western - The Forest & Vale to be precise.

I was going to take my bike but before we left I looked in my 100 Greatest Cycling Climbs book and spotted a number of the climbs in the vicinity. One of these was #55 - Rosedale Chimney. Not only was it close - but it was easily ride-able (is that a word?) from the Hotel and I had plotted a loop that came out at about 24 miles. The original plan was to do this Saturday morning but I changed the plan and modified the route to return back to the village of Rosedale Abbey and meet my wife in the village and then go on from there for the rest of the day.

Here's the route and profile:


The climb is rated as 10/10 so was a bit of a "must do" and I assumed that it would be similar to the beast that is Hardknott Pass that I failed to climb in the summer of 2014.

We got up and had breakfast and then I got ready. It was a chilly but not cold with a noticeable wind - but again not too strong. However within the first few miles I felt decidedly unfit. I needed the lower gears and my heart rate was all over the place. I knew at that point that the climb would be a challenge but was hoping that the 10 mile run to the foot of the climb would get me fully warmed up and feeling better. The route was a gradual ascent from mile 3 to mile 10 and by about mile 8 I was feeling a bit better and thought I was in with a chance.

As you arrive in the village (from Pickering) and take the first sharp left to the climb you see this sign - it's pretty clear that it will be steep!


It was steep enough here that I dropped onto the 34T chain ring to try and spin up the cadence some more. Round the left hander that can just be seen in the distance of the above photo the gradient starts to bite but its still nearly 500m to the proper foot of the climb, which is just past a pub. Again the signage makes it clear that this will be tough:


This is where the climb starts properly. At this point I was already in the lowest gear I had (34-28) and it was hurting. I pedalled on round the first gentle left hander and could then see the cattle grid and the first (right hand) hairpin. I took this right on the left side to minimise the gradient but it kicked up even steeper at this point. The 2nd (left) hairpin seems only a few minutes away but I was struggling by now and did not take it as wide as I should have.

Once you come round the 2nd hairpin bend the road goes straight up at 20%+  with no respite. I pushed on but was getting slower and slower. On the few occasions I was able to glance at my Garmin I could see I was doing barely 3-4mph and at this speed keeping straight is a huge effort. I kept digging as deep as I could but I knew then that I would not make it without walking. I gave it one last push but had absolutely nothing left at all and had to pull to the left and stop. I was completely blown. My HR was ~185bpm and I could barely walk.

I walked for about 1-200m and managed to get back on and ride to the top but it took a good 5 minutes to recover.


I managed 9:55 - vs the book time of 9:00. Given that I had to walk with hindsight this was not so bad perhaps. Position wise - 487th of 1287 so again - none too shabby.

There was then a long run down hill (with an element of a tailwind) - I got 3rd for 2015:


I then followed the Garmin route back to Rosedale Abbey village and then back up to the very bottom of the hill to the pub just at the start of the climb proper and met my wife - we went on over the moors to Whitby and then down the coast via Robin Hood's Bay for the rest of the day.

So what about the climb? It was an absolute beast - on a par with Hardknott pass at least. I thought about why I failed - I think it was a mix of quite a cold day (it was 2-3 Deg C) at the Chimney, not having a low enough gear - whether I would have made it with a 34-30 I don't know, but mainly not being properly bike fit yet as its quite early in the year. I think that the fact that my HR was all over the place on the run over and the fact that once it peaked at about 185bpm I was blown was the reason - there was nothing left. When I climbed Wrynose I had the same HR but I sustained it for a few minutes - this time once I hit the peak - that was it.

Here's the link to the page on the blog with the records of my attempts on the climbs: My 100 Cimbs Progress

Also... my wife gave me a Garmin Virb Elite for my birthday and this was the first ride I used it on - not an auspicious start in reality.

Here's the video I created using the Garmin software - with some of the data from my Garmin 800 overlaid on it. You can see when I had to stop as my head is bent over the bars!


Here's the link to the Video on Youtube as well: http://youtu.be/oPB9CZlKOWI

This one has been uploaded at up to 1080pso if you have the bandwidth it looks great.

I'll write a more detailed review of it in a later post - but my initial thoughts are: excellent quality, easy to use.