Saturday, 5 December 2015

Building Yet Another Bike

(Updated 22 Dec 2015)

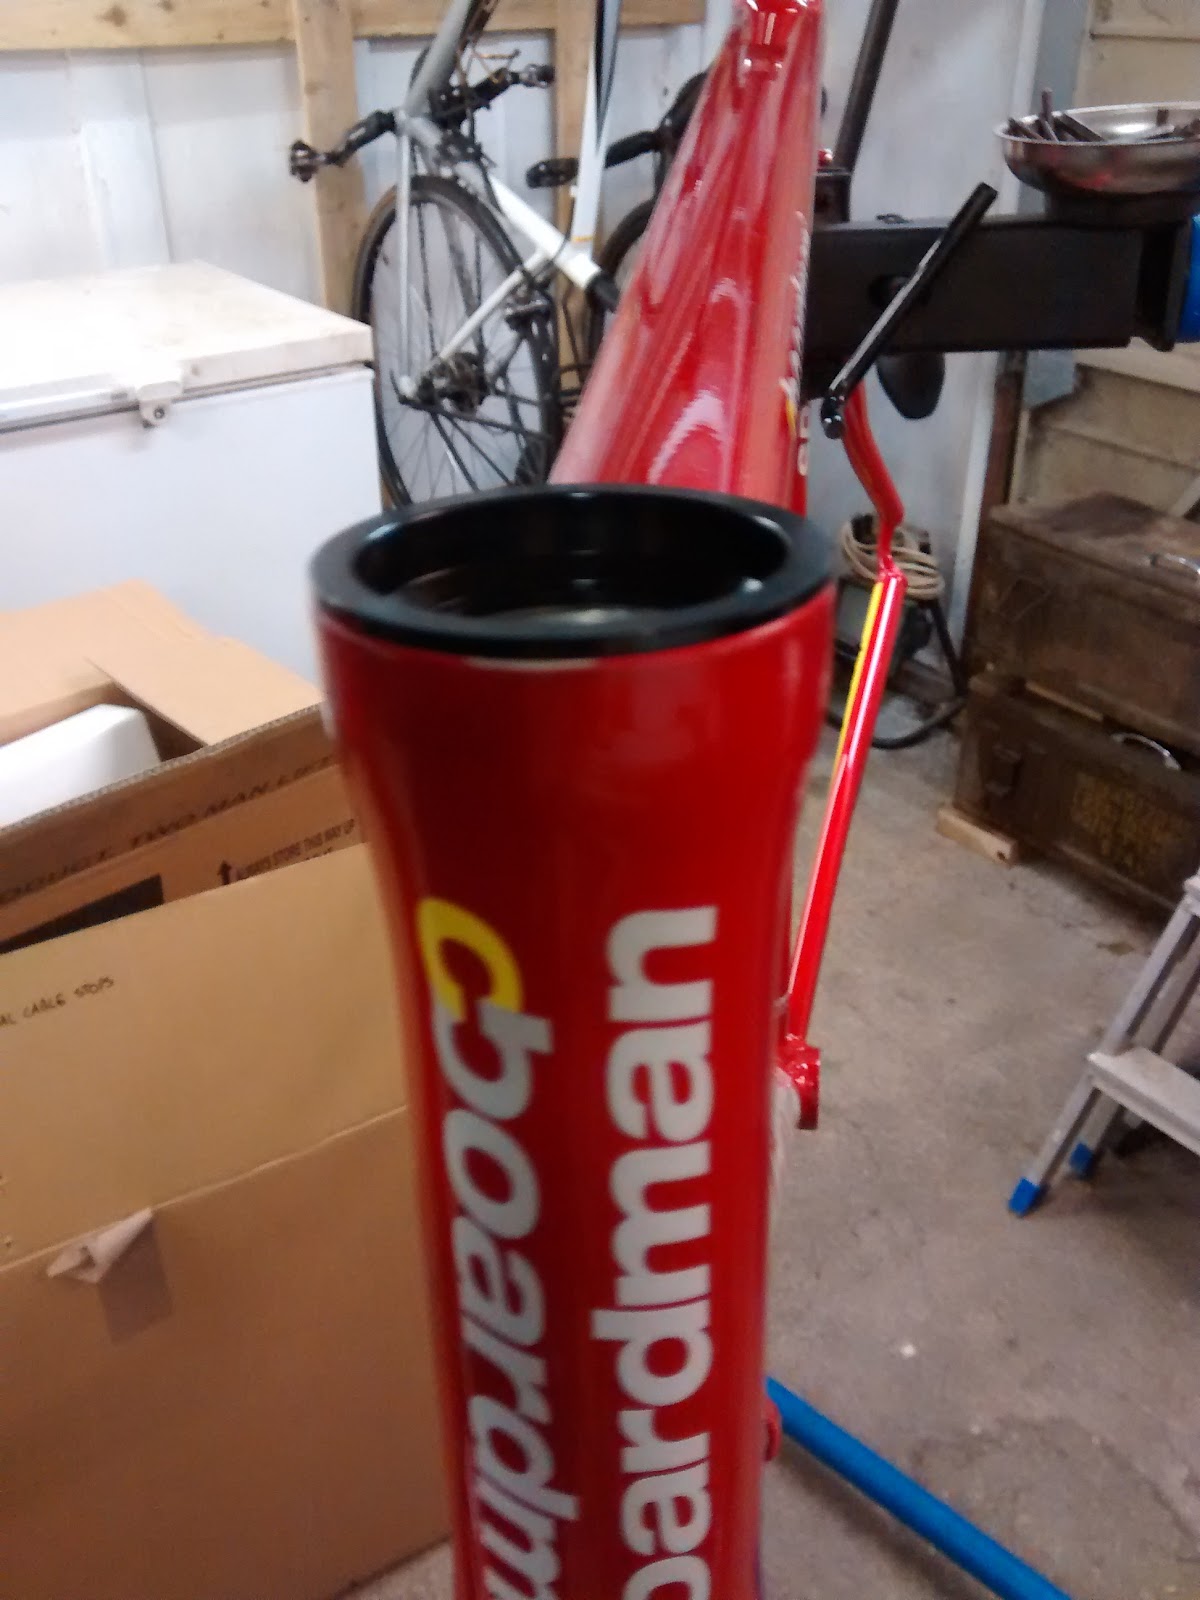
At the start of November 2015 I was knocked off my bike. As a result my Giant Defy was written off. Coincidentally I had been half looking for a cheap frame and fork to buy to put all my spare components onto and build a 3rd bike. I had been looking on and off for several months but by luck saw a brand new Boardman Road Sport Frame & Forks (55cm) on Ebay at an acceptable price:


I put a bid on and didn't expect to win but to my surprise I was the only bidder and won. Not only that, having paid, I found out that the seller worked a couple of miles from my house so although I waited a few days longer got it delivered for free.

The next step was to get hold of the bits that I did not have. This was: headset, dérailleur cable guide under the bottom bracket, band on front dérailleur adaptor and brake cable end stops for the internal rear brake cable. I had a complete 105 5700 Group set, handle bars, stem, saddle, pedals, wheels and nearly everything else from a number of previous upgrade projects, so hoped that the whole build would come in at around £100.

It took some careful measuring and research but I was able to source all the parts, either from Wiggle, Evans Cycles or Ebay. The biggest consideration was whether or not to have the headset fitted or to do it myself. I have had it done before for several reasons - 1 - you need some special tools that I am unlikely to use that often and 2 - getting the right headset can be difficult. 

However I decided that I'd do it myself and either buy or make the tools, not least because seller thoughtfully provided the specific details needed for the headset - that is as per the
SHIS number (Cane Creek - Standardised Headset Identification System) it was:
 

ZS 44 / 28.6 | ZS 44 / 30

To understand the SHIS numbers it is as follows: red text = headtube sizes Top | Bottom and text in green = fork steerer tube diameters Top | Bottom


Even with this information (and measuring the frame and forks with a digital vernier gauge) it was still quite hard to source and head set to this size at a reasonable price. In the end I found one on EBay, it was an "Oxford Components" brand.

The bearings themselves were (semi) sealed units and were ID = 30.2mm, OD = 41mm, Height =7.4mm, contact angle 45Deg. The bearings were marked as "CBB41 4D16":


Its just about possible to see on this photo

The tools needed were a headset press, crown race press and steerer cutter. An internet search shows that a headset press and a crown race seating tool can be home made. Cutting the steerer tube is tricky and I decided to buy a saw guide - I got the Topeak Threadless Saw Guide Tool from Evans Cycles at just under £20.

The Headset press I made with some 10mm studded rod and some aluminium plate that I had from a previous project. I cut 2 pieces of the plate into a square bigger than the 44mm diameter of the bearings and drilled a hole through the centre. Here it is before I pressed the bearing races in:


Lower race before being fitted


It worked quite well but the plate tended to slip to one side a little so it was necessary to tighten a little at a time and ensure that the bearings were being pulled in square and then loosening and re-aligning slightly to pull down another little turn. Despite this the bearings were inserted square within less than 10 minutes. It would obviously have been quicker with a proper tool but this one cost me nothing.

Here are the races seated:


For the crown race seating tool a different approach was needed. Again an Internet search says to knock it down with a piece of plastic plumbing pipe. Luckily I had a piece of this as well:


I had a little more trouble here - I could only drive it on a little way and then at an angle. I measured again and the vernier suggested just a few 100ths of a mm difference in the inner diameter of the race and outer diameter of the fork as you'd expect but it just would not go on. Therefore I very carefully used a fine file and dressed the fork surface a little. After this the crown race could be driven on flush to the top of the fork crown.


I could then loosely assemble the fork and stem to mark up the steerer for cutting. I was fitting 25mm of spacers so I had a little scope for 1 mistake:


Having marked up I mounted the fork in the vice and fixed the tool onto the steerer and made the cut:


It was very easy and made a very straight cut:


The Steerer Tube Offcut
I could then fit the star spangled nut.


There's probably a tool for this as well but I carefully put the bolt in the thread and pushed/tapped it in with a plastic mallet. Although it does need to be tight its only there for the  pre-load setting so does not need to be a massive job. I was able to align it pretty well with some gentle tapping with a plastic mallet

With all these task complete I could then assemble the fork and headset properly and move on to the more routine tasks.

There were a couple of issues on the way. Both were related to the brakes. 

The first was that the rear brake has an internal cable in the top tube. I had sourced these parts for the termination of the cable outers in to the frame from EBay:


Again some careful measuring of the frame and reference to the specification suggested that they should just drop in - they did not of course, but I was able to carefully open up the frame a little (it was probably a bit of paint and manufacturing tolerance) using the hand tool shown:


The hand tool used to open the holes
They fitted perfectly after this. I need to grease slightly this area to prevent the bare aluminium oxidising to quickly (which has happened to my son's bike).

The second problem was with both brakes. The Boardman frame needs longer drop brakes (57mm I believe) - the Shimano 5700 105 brakes I had were too short even with the pads at the lowest possible position. This was a bit of a blow but I had a spare set of Tektro brakes that had been fitted to my son's Boardman and these fitted. In addition, not just a longer reach is needed but also for the front brake I needed to pack out the brake from the fork using some on the ridged aluminium washers to stop the pads hitting the frame:


Thanks to Red Kite Cycles in Shirley for these in return for a biscuit fund donation.

Apart from this the build was reasonably straight forward.

I needed some threaded barrel adjusters for the front and rear dérailleur cables to join the down tube:


And then ended up with a completed bike:


I took a few weights:

Frame: 1.91 kg     Fork: 0.91 kg

Final bike weight: 9.3kg which I thought was not too bad

The final specification is :

Frame: Aluminium 55cm "Boardman Road Race"
Fork: Aluminium Boardman
Wheels: Shimano RS80
Tyres: Continental GP4000S
Gears: Shimano 5700 105 10Speed
Chainset: Shimano 105 50/34 172.5mm
Rear Dérailleur: Shimano 5700 medium cage
Front Dérailleur: Shimano 5700
Cassette: Shimano 105 11-28
Chain: KMC 10speed with missing link
Pedals: Shimano R540
Brakes: Tektro
Stem: Deda
Handlebars: FSA Aluminium
Saddle: Selle Royale


Cost (excluding tools):
Frame: £75.55
Barrel Adjusters: £4.99
Cable Ends: £2.55
Headset: £21.99
Bar Tape: 12.99

Total: £118.07

Not bad for a reasonable specification bike

(Updated 22 Dec 2015)

The first ride was OK. I needed to drop the saddle ~5mm which I did mid-ride. The rear brake was also pretty poor. I made 2 modifications - firstly to shorten the outer cable where it entered the top tube and secondly to pack the pads from the arms. 

Before

After
The difference in the before-after states was only 5cm or so at most but has made a marked difference in feel and performance. I have looked at my son's Boardman (same frame) and in fact the cable is shorter still so there's possibly some room for further improvement. 

The reason I packed the brake pads out (no photo available) is because the RS80 wheels fitted are quite narrow and this meant for the Tektro brakes they needed to be quite closed even in the normal position. This combined with the pads that are quite worn meant that I think quite a lot of the leverage is lost already even before the lever is pulled. There's probably only a few winter months left in the pads so I'll replace them and review the brakes then. If they are no better I'll probably get some of the long drop Shimano 57mm versions such as these:

 
Shimano BR-R451 Dual Pivot 57mm Drop Brake Caliper


Shimano R650 Dual Pivot 57mm Drop Brake Caliper


Wednesday, 4 November 2015

Knocked Off!

A quick update 12 December 2015
Just over a month after being knocked off I have received some cheques as part of the compensation for material loss. This is down to the very effective solicitors that have been appointed by the British Cycling Ride Membership. Its not all sorted yet but progressing well and more quickly than I expected. I have also had an assessment for the personal injury element. I am not chasing this that vigorously - I have been lucky and not badly injured. I'll definitely let the solicitors argue that one

For the first time in over 30000 miles and nearly 7 years I have been knocked off. The fact that I am writing this tells me that I was lucky. 3.2 Miles from home, on a roundabout a car just pulled into me:


Its not quite accurate but you can see the that bike carried on and stopped and then was brought back to nearer me!

The data shows I was hit at about 16mph:


I think the car clipped the rear wheel, knocked me off the bike and flying about 10ft down the road and the bike went a further 10ft or so as well. My pannier was thrown off and ended about 30ft away in the opposite direction!

Fortunately the driver stopped as did another couple of cars. I was momentarily stunned, then angry, but then very shaken and couldn't get out of the road and needed help to get to the traffic island

The other cars called an ambulance and as I was about 1/2mile from the A&E one arrived very quickly (one of the first responders, followed by a "proper" unit about 2 minutes later).

The police also arrived - but seemed very impressed with the number and power of my lights on the front. I had bought a big LED light the previous week and this was its first outing:


How I was not seen I still don't know!

While they were dealing with me there was a rear-ender from some onlookers passing by!

I was very shaken up and suffered a big adrenaline withdrawal after a few minutes, and was light headed. I was put in the ambulance but I only seemed to have soft tissue damage - a very sore and stiff shoulder

The bike was put in the ambulance and it looked OK, and I could only see at the time that the saddle was scrap - the seat part was very bent on the rails

I called my wife and she came and got me and I had another look over me and my bike

Despite my shorts looking OK, when I got home what I thought was just a bruise was a fairly deep bit of road rash right on my hip bone:


What it looked liked after being dressed when I got home

What it looked like in the evening
As well as the road rash my shoulder was very stiff and has been applied regularly with one of these Ibuprofen gels, plus several paracetamol.

A closer look at my bike showed:


Destroyed Saddle

Possibly a bent rear Derailleur

Bent Left Hand side handlebar

Non-drive side crank arm now fouls chain stay

My lunch box also broke:


Amazingly my work laptop was OK! I Think my lunchbox took the impact

I did not go into work and spent the day feeling very low and bruised. Not looking forward to tomorrow

My bike will go to a couple of bike shops for an assessment in the next few days. Given some of the damage a lot of load must have gone into the frame so I hope its OK.

I am a member of British Cycling which provides legal assistance. I'll use them to try and recover the bike repair costs

Sunday, 11 October 2015

Cole Rollen Wheel Failure - Update 4 November

I was riding home from work mid September on my Giant in and the rear wheel was rubbing. A quick glance when I got home suggested that it needed a little truing so I swapped back the original heavy duty Giant wheels and thought nothing more of it. This weekend I thought I'd spend a little while trying to pull it back to true and spotted this:


This is a pretty catastrophic failure  - I was lucky I swapped the wheels when I did as this would have been a ride stopping failure!

I have started to strip the wheel down (to keep the hub for general bike maintenance purposes) and have seen another crack in the rim. The front looks OK but I'll double check now.

The wheels have done about 12500 miles - mainly in the Spring to Autumn months. I don't think that's particularly impressive, given that I am also quite light.

Update 4 November: I have scrapped the rims. I cut them up and here is a couple of shots of the cross section:


Saturday, 12 September 2015

100 Climbs #90 - Horseshoe Pass

(Small Updated 13 Sep 2015)

On Sunday 6 September 2015 we decided almost on the spur of the moment to go and watch the Tour of Britain Stage 1 finish in Wrexham.

On the way I took the opportunity to climb 100 Climbs #90 - Horseshoe Pass. We parked in Llangollen and I initially rode the "wrong" way to warm up a little before turning around and starting the climb. I was not sure what to expect as it was classed as a 7/10 and 22 minutes of climbing. It was a reasonable day but there was some wind blowing. The road climbed gently out of Llangollen with nothing too taxing but then it gradually started to steepen. The lack of  a proper warm up soon became apparent and my heart rate was too high and it was hard work even though it was never too steep. After a mile or so I realised that I had forgotten to start my Garmin Virb and did not start it until just before the cattle grid. Around this time I had also started to get my heart rate under control by easing off the pace slightly and I began to feel more comfortable as well. 

I passed a couple on matching his 'n' her Giant bikes - we'd seen them cycling on the A5 towards Llangollen earlier, so they were making slow but steady progress:


A little further on this rather alarming sign appeared


Fortunately the sign was a complete mis-representation (it says this in the 100 Greatest Cycling Climbs book as well) and fortunately the climb maintained a steady gradient. After the sign the road swings left and then right (I think this bit is the 'horseshoe') and then climbs steadily up. In the photo above you can see the road climbing (the grey line) but fortunately once you have got to this bit the gradient progressively eases all the way to the top and I could keep shifting into a higher gear (still on the small ring though) and continue to the top and see the sign for the top:


A few hundred yards beyond the top is the "Ponderosa Cafe" - clearly a very popular motorcyclist haunt.


A quick turn around and small climb back to the top meant I was back on the proper descent. I saw the Giant pair again a few 100 meters from the top. The first pat of the descent was not great - I needed to avoid both potholes and sheep. However once through the horseshoe the surface was super smooth and I got up to 40mph on the descent for a couple of reasonable periods. Taking the cattle grid at 40mph was a moment of focus!

All to soon (after a short small climb) I was back in Llangollen and back at the car

Strava gave the stats here as:
Distance = 3.8m
Height Gain = 1026ft
Average Gradient = 5%
My Time = 22:15
My Average Speed =  10.3mph
Position = 1235 / 5616 

I was pretty pleased with that. It was a 7/10 in "The Book" but I don't think it was that hard. The hardest part was at the bottom as the gradient kept changing making it hard to get a decent rhythm but as the climb progressed it become more consistent.

Here's a video from my Garmin Virb:


Sunday, 6 September 2015

Tour of Britain 2015 - Stage 1 Wrexham

On Sunday 6 September we went to watch the end of the 1st Stage of the Tour of Britain in Wrexham. I rode Horseshoe Pass in the morning and then we drove over to Wrexham for lunch before the race was due to arrive some time between 3 and 4pm. I'd looked for somewhere to park before we left but as we were driving towards Wrexham we saw a sign for ToB Park and Ride so followed that. We rolled up at a small industrial estate with a bus waiting. It turned out that the bus was free so we could not fault that, and it dropped us near the bus station about 5 minutes from the finishing line.

We walked about for a while looking for somewhere to eat and were not that impressed with Wrexham. However we finally found a Wetherspoons in the old The North and South Wales Bank. A lot of people criticise Wetherspoons but they are sympathetic to the buildings they occupy and this was no exception. The roof was beautiful:


Service was OK as well and I had faggots which I like

We then walked over to the "entertainment" area at the finish line. I collected a free Etixx water bottle (that I have sold my soul for with my email address):


We then found somewhere to wait and ended up exactly at the 100m board:


At the 100m line waving the only freebie we managed to get

We then had to wait about 1½ for the riders to arrive. There was some commentary whilst waiting and although there was a big screen we could only see about ¼ of it. Suddenly they were there. Cavendish and Greipl were obvious and were flat out. The atmosphere was tremendous and the roar of the crowd for Cavendish was massive.


Mark Cavendish


Alex Dowsett
At the race end we did push to get nearer the front and just about were able to see the presentation. On the screen Kristian House got promoted to Team Sky!


Kristian House has moved teams all of  a sudden!

Cavendish probably got he biggest cheer - he got a fairly token prize in comparison to what he could have got if he'd been 0.05 seconds faster though.

Mark Cavendish
Then we drove home. All in all - a good day out.

Saturday, 5 September 2015

Cycling in the Alps - A First Timers Review

As I have written tediously I went to the French Alps in late June/early July 2015. It was the first time that I had cycled big mountains and I thought it might be worth documenting the lessons and experiences learnt.

This is a bit of a brain dump in no particular order:

1 - Decide where you are going to go and for how long!
The whole world is your oyster, but it helps to have an idea what you want to do. In my case my sons bought me this book for Christmas 2014:


This was really a spur to decide to go the the French Alps. For me - why there and not elsewhere - or even France instead of Italy or Spain for example? Basically because the Tour de France is a more global event and hence the climbs are more, to use the overused word, "iconic". Further, the really famous climbs are in the French Alps and this is just about drivable in a day. Italy and Spain are at least 2 days driving.

I planned a load of possible routes off in advance (using the Strava Routing tool):


We live in the Midlands but fortunately my parents house is less than 1 hour from the Channel Tunnel and this meant that with an early start (5am) it would be around a 12 hour drive, even fully loaded.

I was able to leave work a bit earlier on the Friday and needed some time to load the car with 3 bikes:


The car was absolutely laden with 3 bikes on the roof and cycling gear, as well as normal holiday stuff in the car.

We didn't have that great a start the night before though, getting caught in a queue as a result of an accident on the M6 less than 30 minutes after leaving home:


Even though its drivable in a day its a very long way and you need to seriously think about sharing between at least 2 and probably 3 three drivers. Once we'd driven of the train at Calais I drove for a 2 hour block or so but felt very tired after that as we'd started off at 5am and had an hours drive to the tunnel at Folkstone, as well as a 4 hour journey the night before.


For once I was a passenger in my own car as my sons put a big chunk of hours in and I fell asleep. We drove for about 9 hours southwards through France almost exclusively on the Payage so we made good progress on the cruise control at 130kph. It cost about 50Euro in tolls and a tank of fuel about halfway (the car was full when we left Kent). We just made it to Bourg d'Oisans on that 2nd tank but it was pretty empty. Normally my focus would do 60mpg+ but on this trip it was down at 35mpg - the cost mainly of 3 bikes on the roof at sustained high speed.

The French roads were very good and we had no delays. Finally about 4pm we approached Grenoble and could tell we were in nearly there as we could see proper mountains. Here's some photos I took with the mountains just in the distance. It took us another 90+ minutes from here to get to Bourg d'Oisans as this was almost the end of the Payage.


We had decided to stay in Bourg d'Oisans at the very foot of the Alpe d'Huez -this was ideally located for a number of the big climbs and some were about an hours drive away. I felt that the town of Bourg d'Oisans would be big enough to provide a range of services and the city of Grenoble was about an hour away. My wife found a camp site just outside the town (actually about 100m from the very foot of the Alpe d'Huex) that had chalets rather than mean we actually go camping and this was an excellent decision

2 - Prepare yourself
Having decided where you're going to go make sure that you really know what climbing a Col really means. Your first thought might be that the 8% average that most of the Cols come out at it's not that steep and there are many steeper places in the UK. That is completely true - but what we don't have in the UK is 8% for 20km. This means that even if you pop out for a 20 mile ride every Sunday, its likely that you'll find it very hard work. This does not mean that you have to be beasting yourself 5 days a week in the 6 months before but you have to be pretty fit and be able to sustain a high level of effort for up to two hours at a time.  
You really need to do this "training" effort up hills as well and not rely on 2 hours riding on the flat. For me in the Midlands, I could only do so much and had to rely more on miles although I did try and seek out some climbs and would also try to climb them in a higher gear than usual to try to work the leg muscles more. I went to France with about 3000 miles of riding for the year to date so felt as good as I could be.

Also - whilst you'll be thinking about the climbing don't forget about the effort of braking. The first descent of the Alpe d'Huez was exciting - its a short descent at ~12km but its a series of semi-straights where it's easy to get to 40mph. Then there's the hairpins and you need to lost ~25mph to get round - and then rinse and repeat. By the time I was at the bottom my arms ached from the repeated braking efforts.

The next day we did Croix de Fer and this was a different descent with long straights and sweeping bends and needed more continuous braking but at lower effort. 

So your legs will ache on the way up and your arms on the way down!

3 - Prepare your bike
3a - fit suitable gears. I know that I am getting older and have been using an 11-28 cassette on a compact for the last 2-3 years. I try not to use the 28 unless I need to but find that I am tending to more often than I used to - mainly to drop the load of my legs to a degree

In addition, cycling in the Lake District (here, and here) and on the Yorkshire Moors (here and here) showed that even a 28 was not low enough for me at times, although Rosedale chimney was a special case.

After a lot of deliberation I decided that I would bite the bullet and get a lower bail out gear so got a Shimano Ultegra 6700 10spd 12-30 cassette:


I was a bit concerned about using it with short cage rear derailleur but as I wrote here it actually worked very well. Here it is in the lowest gear:


And here it is in the gear not to be used (big/big)


It was an Ultegra cassette as 105 is not made with a cassette bigger than 28 for 10 speed - but Ultegra is more shiny than 105! In fact with 6800 11spd Ultegra out for a year or so the 6700 range is much better value for money.

I had no qualms about putting such a low gear on - my objective was to ride all the mountains without stopping or needing to get off. I felt that for the first week I needed that 30 tooth but for the second week it was there more for when I was tired rather than I needed it just to progress. I would have found the cycling a lot less pleasant if I had left the 11-28 on.

3b - make sure the tyres and inner tunes are in good condition
Most of the thought were about getting up but of course you come down as well, and the speed can be high and sustained, as can the need to brake hard to get round the hairpins. For this reason I fitted a pair of new tyres - my favourite Continental GP400s. Again I wanted to be on holiday to ride my bike and not be sitting at the side of the road mending punctures. As I also found out, sustained and repeated braking from high speed over a 20km descent combined with hot weather, the wheels and tyres got very hot - not quite too hot to touch but close.

3c - make sure the brakes are in good condition
For all the reasons in 3b!

4 - Always warm up before starting climbing
It's tempting to think that with the warm weather you are ready to go. The first day out we rode from the camp site to the foot of the Col d'Ornon, about 2 miles maximum. About 500yards up the Col I was completely in the red and whilst I managed to make it to the top this lack of preparation at the bottom cost me all the way. After that I always rode at least 5 miles before the start of any climb - even if this was a ride in the opposite direction and back again. You might need more or less time but be ready - once you start climbing there is unlikely to be any respite for over an hour until you reach the top.

5 - Take plenty of water
If the weather is even partially warm you will get very hot and thirsty, so make sure that you take at least 2 750ml bottles of water or other drink with you. In addition if you're climbing in the hot sun its tempting to pour some water over you to cool down. When I climbed the Col de Sarenne I almost ran out of water as I was drinking it and using it to cool down and the last 1km or so was very unpleasant

There are quite a few "Eau Potable" places along the roads if you keep your eyes open (generally in or near the villages).

Here's one:


6 - Wear and take suitable clothing
It can be sweltering at the bottom but several thousand feet higher it can be quite cool. Make sure you look at the weather forecast and plan accordingly. Don't forget that you'll be very warm on the ascent with the heat and the effort of the climb, but on the descent when you are hardly doing anything and just rolling down you can get quite cold from the wind speed and lack of physical effort. On the climb of the Galibier I took my Pocket Rocket in my jersey just in case as its so small and light (but didn't need it).


I also found that a full zip jersey is much more useful than a part zip one - when its hot you need the air round you to cool - it might flap about a but but take all the help you can get

7 - pace yourself and possibly use a heart rate monitor
Its all about pace. Go too fast and you'll blow without doubt. As well as considering my gearing - see above - I also replaced the Garmin strap of my heart rate monitor with a Polar strap (see here). This was to provide a means for me to try and keep myself out of the red and pace myself at say 85% of what I think my maximum heart rate is (or to tell me when its too high and slow down). I found this very useful. On all ascents I rode with just 4 values showing - current heart rate, average heart rate, gradient as % and what the Garmin said was % of maximum (I was less bothered about this one but it was already on the screen definition). Mainly I tried to keep my heart rate around 150bpm which is what I found sustainable in terms of not just making progress but also maintaining progress. If it went higher I could slow a little and if it dropped I could try harder.

8 - Take some money with you
Most Cols have something on the summit. You'll appreciate a drink or ice cream at the very least. When I was almost blown climbing the Sarenne it was a great relief to have something to eat and drink.


And this is what I had in Valloire after descending the Galibier before climbing back up the Telegraphe:


9 - Take a camera
Even if its just on your phone there are views that you'll remember for a long time (these are my 2 favourites):

At the top of the Croix de Fer

At the top of the Galibier
10 - Don't be disappointed about missing some Strava segments
It was clear that in some places GPS signals are weak and Strava will think you are off the road. This was easier to tell as I have a Garmin 800 and my son a 500 and often on some routes the GPS trace was all over the place. 

What is important is to enjoy the riding and scenery and almost (not totally) forget about Strava for once.

11 - Finally - Make sure you have a good time