Update 17 October 2013 Bit of an update here:My home made Thule 561 more details
Updated 15 June 2013
I am fortunate to have a number of bikes over the years and have bought various racks and carriers to carry them on a car. I initially bought something similar to this (the rack not the bike!):
 |
| Halfords "middle of the range" roof carrier |
The one I have is (looks) a bit better than this and in fact I have 2 of these. Its a quite high quality aluminium extrusion with a down tube clamping arrangement, which is lockable. The wheels are secured using self-locking cable straps much like pedal toe-clip straps. The frame clamp is a light weight steel tube.
Advantages of this type of rack are that the bike remains assembled whilst being carried and the down tube clamp provides a degree of stability
Disadvantages are
- the bike is very tall when trying to fit to the rack - it was almost impossible on a Land Rover Freelander 2
- the down tube clamp could provide more lateral stability and would be better if the base was wider to give more triangulation
- for fat down tubes the clamp needs to be dis-assembled before it will go round the tube and then needs re-assembly once held around which is very difficult one-handed
- the overall height of the vehicle becomes very tall once a bike is fitted
I also have something similar to this (not quite the same as mine is older):
The reason for getting one of these was that about 12 years ago I was lucky to start having company cars. The scheme I am on is fantastic and means that typically I don't keep a car for much more than 6 months, and I have a wide choice of vehicles (from 2 manufacturers). A down side to this (if there is such a thing!) is that its expensive to keep up with roof bars for all these cars and the days of a universal gutter mounting roof bar are long gone - all modern cars need a special fitting system. As such a tail gate system is a better compromise and fitted all the cars I had. However I was never that confidant about the overall robustness (especially with plastic bumpers) and always used some extra rope for belt and braces through the tailgate hinge to the bike.
In the end, because I wanted to transport my Focus Cayo and did not trust the tailgate rack for an expensive bike I bit the bullet and bought some "quality" roof bars - some Thule ones to be precise for a Freelander 2 I had at that time. I duly had a trial fitting of the bars - I can see why they cost more as they fit really well and securely and fitted my Focus to the roof with one of the Halfords roof carriers as above. I was less than impressed.
I was concerned about the clamping arrangement for the frame - the frame is quite a large diameter which meant that the clamp was awkward to fit and then I was nervous about how much clamp load to apply to secure the bike as it moved more than I wanted even when I had reached the maximum load I felt comfortable with for the clamp. In reality I know that carbon fibre frames are very strong, but a down tube clamp load is not what they are designed for.
The solution for this was a relatively easy solution to get a Thule 561 Cycle Carrier
This is an excellent piece of equipment and is, of the 3 bike carriers I have, by far the best system for carrying a bike. Almost all of the load of holding the bike to the rack is done by the quick release clamp through the front fork. As this part of the bike is designed for high loading then there is no issue with this. The retention strap for the rear wheel is really only to stop the wheel bouncing. The carrier is also very simple and quick to fit to the roof bars. Both fixing points to the roof bar have an adjustable over-centre clamp. The rear clamp is just clamped, but the front is lockable, as is the fork clamp.
I have found with experience that you do need to do these really quite tight or the rack will move slightly.
Once the roof bars are on the roof it takes no more that 10 minutes to fit the 561 and bike and secure it all. It really is excellent.
After a couple of years and the growing interest of my son in cycling it became more necessary to get a second quality carrier like the 561. The easy option would have been to just buy a 2nd one, however being an engineer and having something to start from I felt that I could make one using one of the Halfords units as a starting point. So this is what I did.
The Mark 1
The original plan was to make some form of quick release fork mounting mechanism using a spare front axle that I would fix to the aluminium channel of the Halfords unit. I had given this some thought and had in my mind a fabricated solution of some sort. It needed to be fabricated as I don't have access to either machine tools or any welding equipment, and although my father does have some machines and a gas torch welder these are not easily accessible. Therefore the plan was to make something using various angle and box sections.
However another project I was working on had involved some improvements to my garage and as part of this was thinking about some secure bike racking. Whilst searching for this I came across the following from Saris:
This was exactly what I had been looking for and at £16.99 from Chain Reaction Cycles was cheap enough to take a punt at.
Having acquired the most complex piece rather than having to make it I was enthused to actually finish the project. The plan was to use a rectangular section fixed to the aluminium extrusion and then mount the Saris clamp to that section. Here is a photo of it completed to show the aim.
 |
| End-on view of mount showing construction |
 |
| Another view to show construction |
 |
| Another View |
 |
| Overhead view |
 |
| Side View |
The aluminium was order via an eBay supplier. I got a 500mm length of the rectangular section cut in 3 pieces (2 off 125mm and 1 off 250mm) and some 5mm aluminium plate - a 250mm square cut into 2 off 125mm square and a 125x250mm piece. The reason for the definition of the sizes is that 2 cuts were included in the price. The section was sawn and the plate guillotined, and the sizes were within 0.5mm. I was very happy with the material and the service and would use the supplier again.
This all looked great and worked in the garage. However when fitted to the car a problem came to light. The way the the end of the carrier is fitted to the roof bars is via a metal pressing that rests in the bottom of the V of the section. In normal use this clamp is the rear of the carrier and takes no load, whilst the other end is clamped with a more stiff structure (not shown).
Here is a couple of pictures that sort of show how the rack is clamped at one end - the end I added my new design to:
Given that this end is normally just having the rear wheel sitting in it its a more that suitable design. My design however had the front forks mounted here which put all the side forces onto the extrusion which was not supported
As a result the highest load from the bike is through my new additions, and the design had no stiffness where needed.I t was quite unfit for purpose and a complete redesign was required.
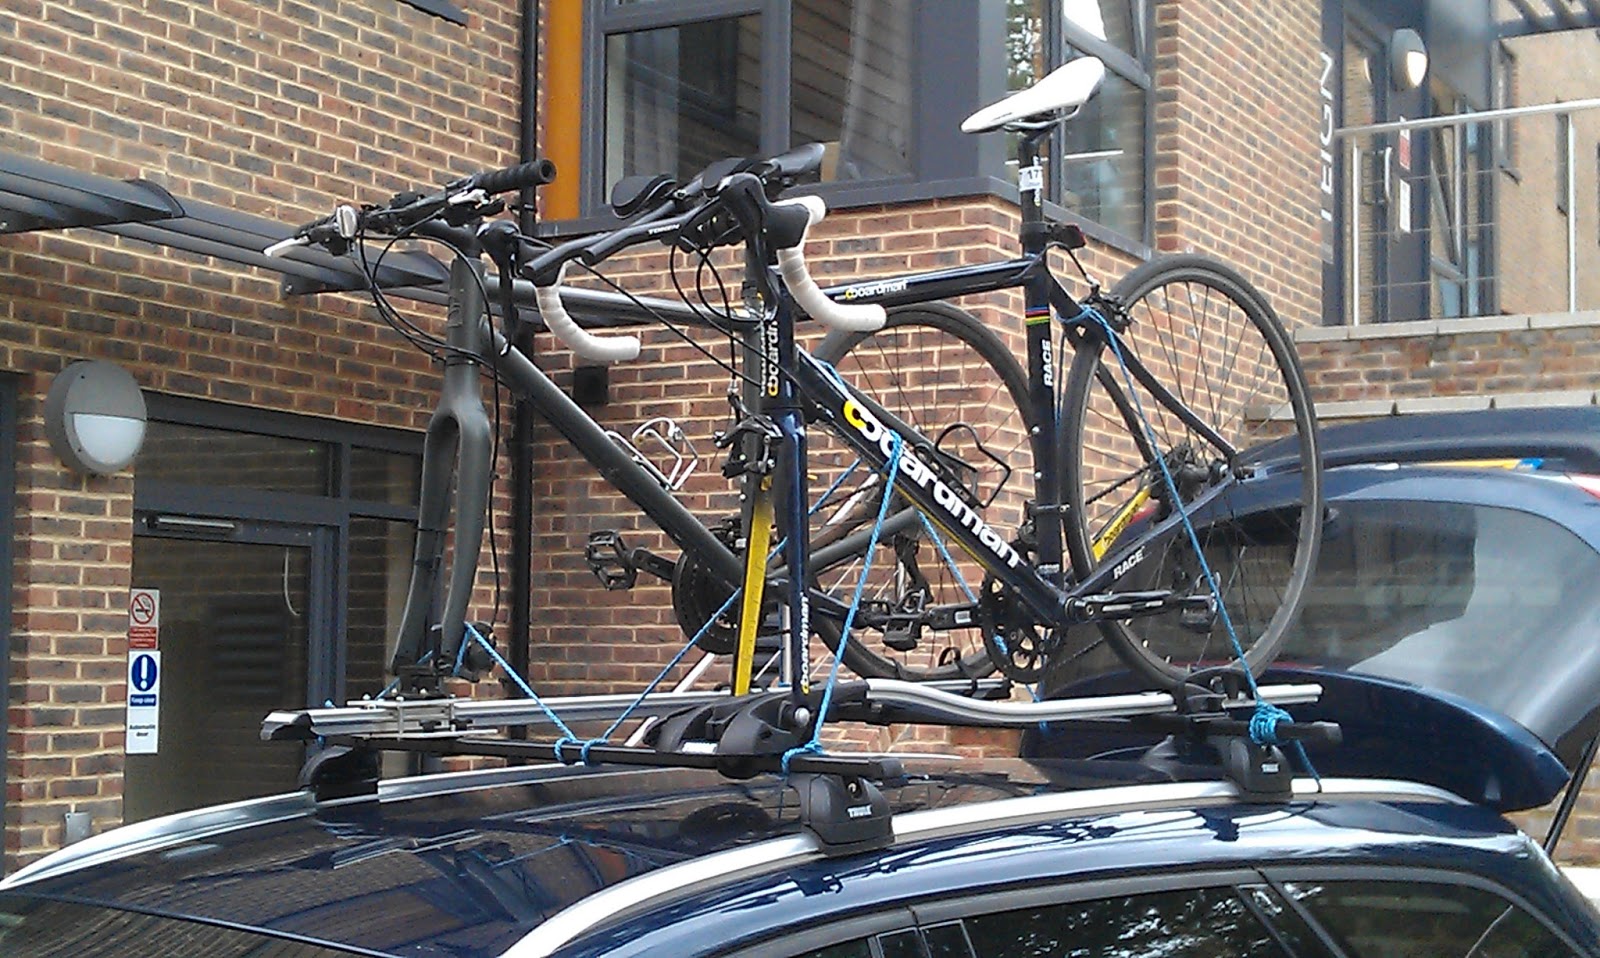
This led to the mark 2 version:
Here are some pictures of a much more substantial version that is fit for purpose.
It was used to bring back one of my sons bikes from Exeter University. 150+ motorway miles with very strong winds proved to be no problem - the bike was securely held and I was very happy
More words to follow describing the reasons for the redesign strategy at a later date.
 |
| The Mark 2 version - end on view |
 |
| The Mark 2 version - side view |
 |
| The Mark 2 version - another end on view |
 |
| The Mark 2 version - yet another end on view |
 |
| The Mark 2 version - another side view |
 |
| The Mark 2 version - end on view |